Follow Me On Social Media!


Funfetti Cookie Recipe: The Best Joyful Treat for Any Occasion
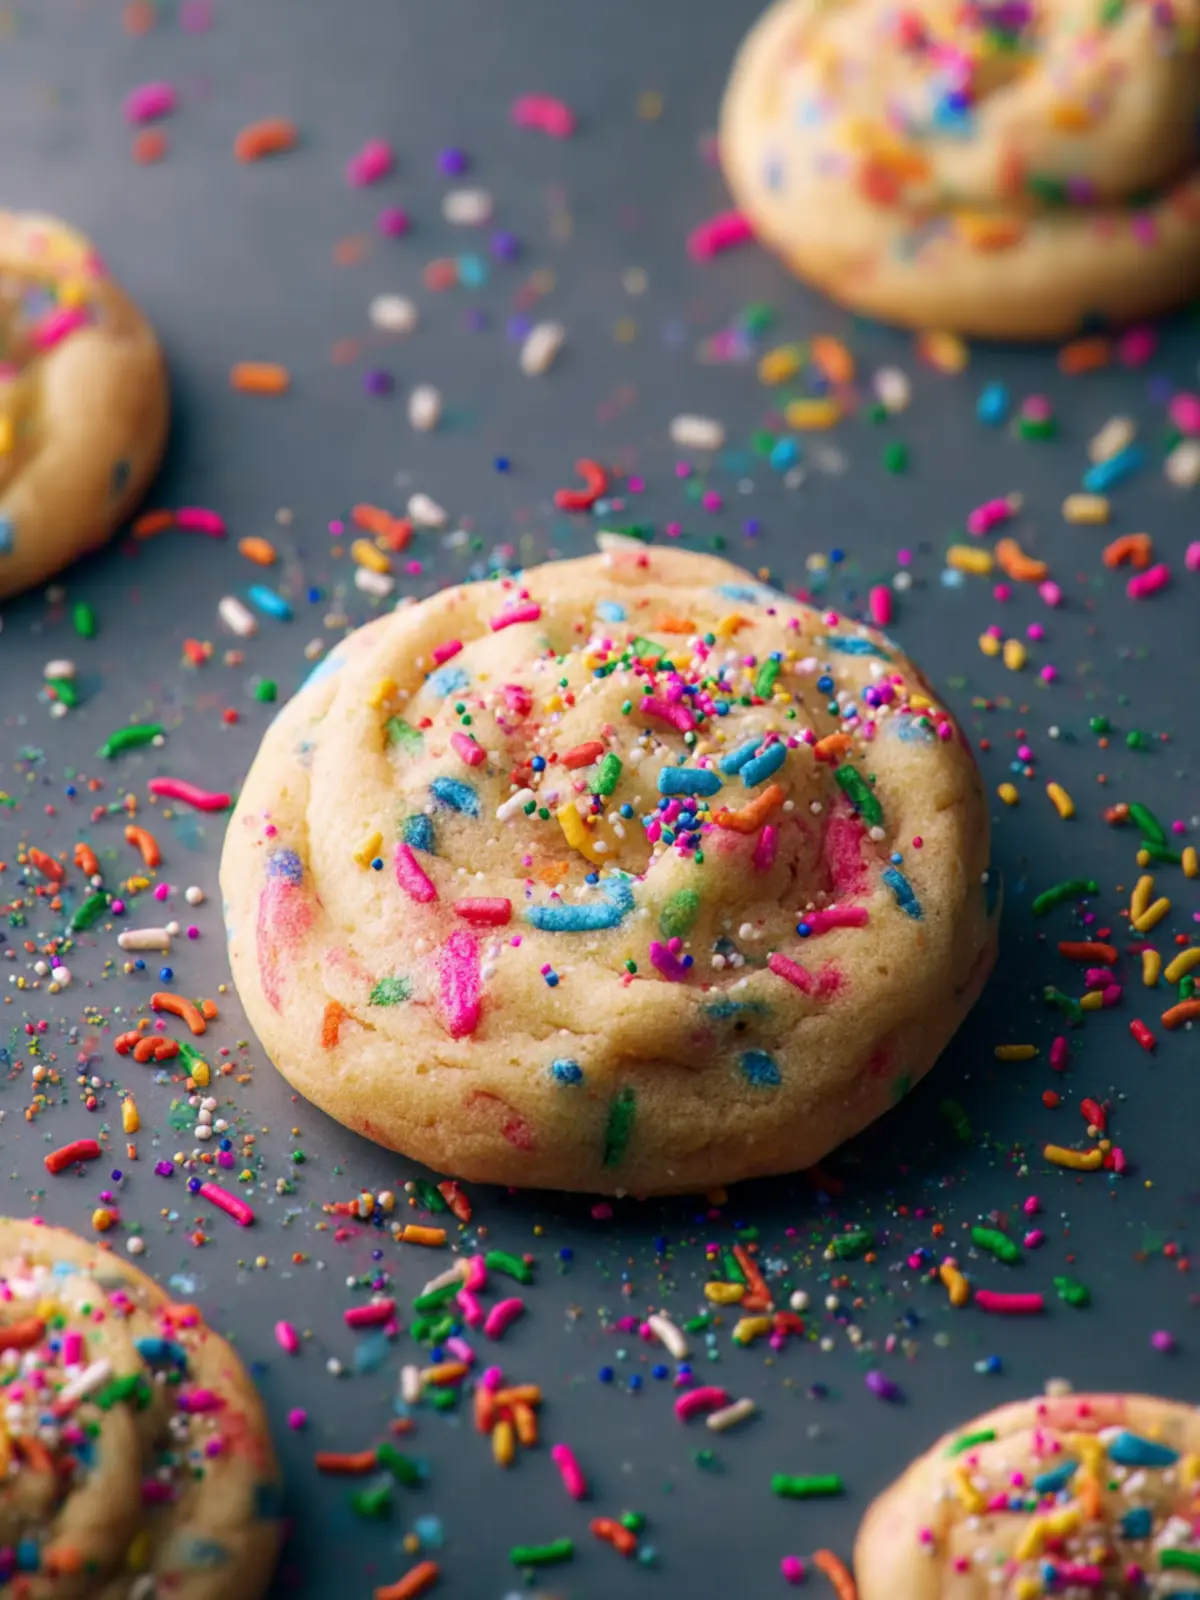
Introduction to Funfetti Cookie Recipe
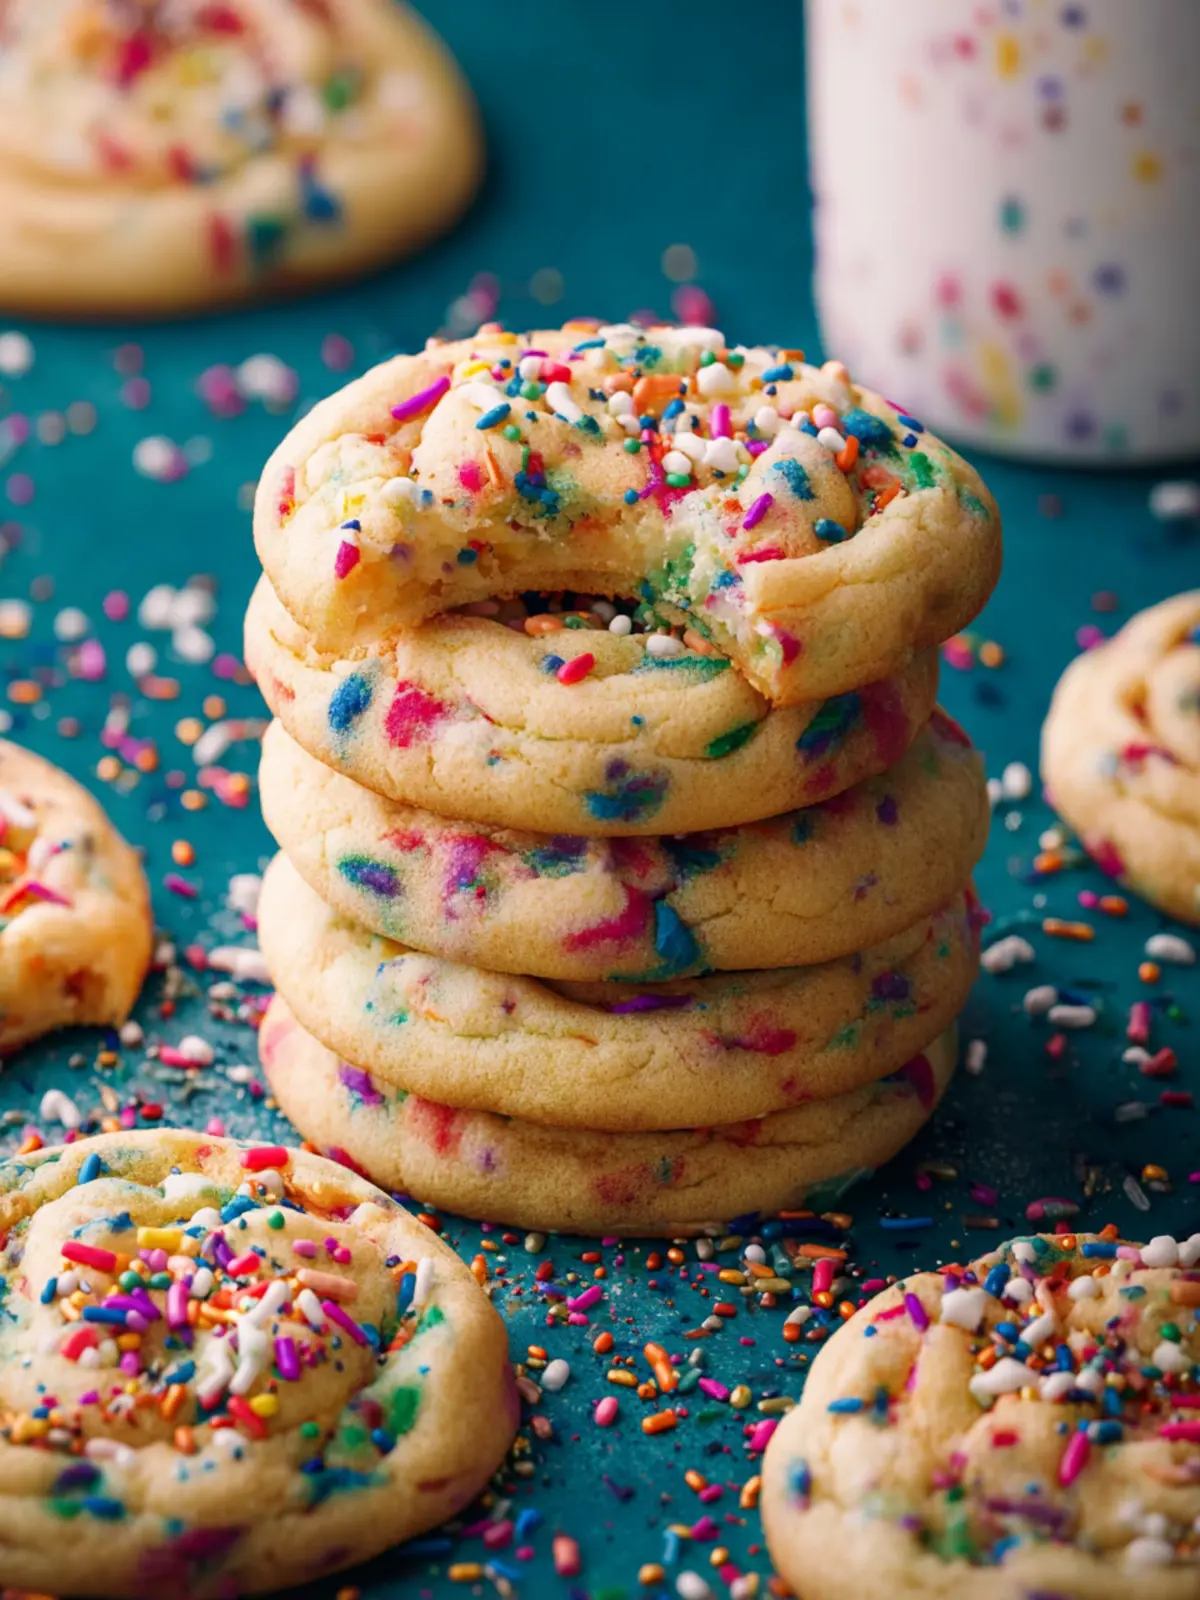
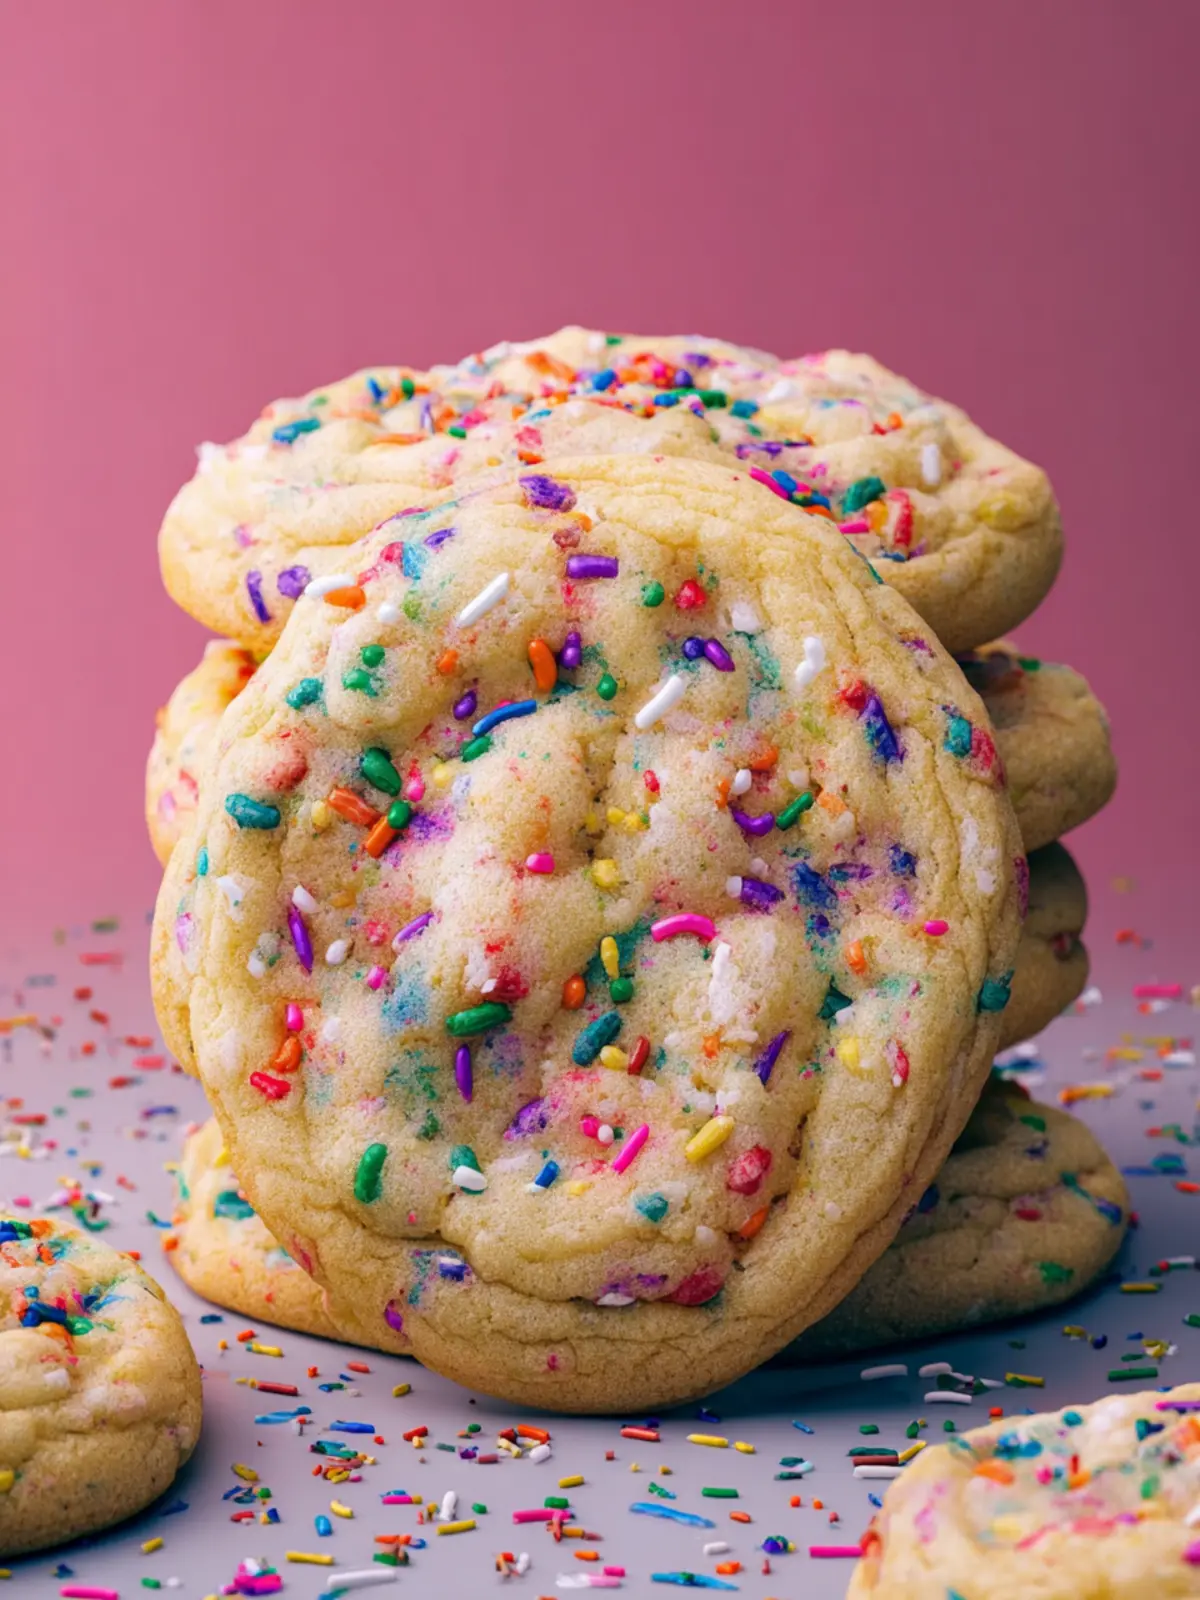
There’s something undeniably magical about a funfetti cookie recipe. These delightful treats not only satisfy your sweet tooth but also bring a sprinkle of joy to any occasion. Imagine the vibrant colors dancing against the backdrop of buttery dough, inviting you to indulge in a flavorful bite. As a kid, I loved celebrating birthdays with cakes adorned in rainbow sprinkles, and this recipe captures that same joyous spirit – in cookie form.
Funfetti cookies are a playful twist on classic recipes, reimagined to elevate your baking experience. They’re soft, chewy, and packed with colorful sprinkles that make every cookie feel like a celebration. What sets these cookies apart is their cheerful appearance and delightful texture that balances crisp edges with a soft center. Each bite bursts with flavor and nostalgia, transporting you back to carefree childhood days filled with cake batter and birthday parties.
What makes Funfetti cookies so special?
The beauty of funfetti cookies lies not just in their appearance, but also in their versatility. They can brighten up any gathering, be it a casual coffee catch-up or a festive holiday party. The addition of sprinkles elevates simple cookies into a treat that evokes smiles and compliments. Plus, they’re incredibly easy to whip up, making them an ideal choice whether you’re an experienced baker or just starting.
Instead of the typical chocolate chips, these cookies use colorful sprinkles that infuse your baking with a sense of fun. The subtle flavor of vanilla mixed with the sweetness of the cookies creates a comforting yet exciting treat. And with every batch you bake, there’s room for creativity: mix and match your favorite sprinkles, or throw in a few added ingredients like nuts or chocolate chunks for variety!
So why not bring a little more happiness to your day with this funfetti cookie recipe? Gather your ingredients and get ready to experience the delicious joy that comes from bringing these colorful cookies into your culinary repertoire. You might just find them to be your new favorite go-to treat!
Key Ingredients for Funfetti Cookies
Creating the perfect funfetti cookie recipe is about harmonizing the right flavors and textures, making each bite a celebration in itself. Let’s dive into the key ingredients that make these cookies irresistibly delightful.
-
Butter: I prefer using unsalted butter for that rich, creamy base. This not only supports the overall flavor but also ensures you can control the saltiness of your cookies. Softened butter is essential; it whips easily with sugar to create a light and fluffy dough.
-
Sugar: A blend of granulated sugar and brown sugar is my go-to. Granulated sugar helps in achieving that perfect crispness, while brown sugar lends chewiness and a hint of caramel flavor.
-
Eggs: One large egg does the trick, binding the ingredients together while adding moisture. Make sure it’s at room temperature for the best incorporation.
-
Flour: All-purpose flour is perfect for achieving that soft, chewy texture. You might experiment with a gluten-free blend if you need a gluten-free option, but I find all-purpose flour provides the best results.
-
Baking Powder: This is essential for elevating your cookies, making them light and fluffy while they bake.
-
Sprinkles: The star of the show! Use colorful jimmies or sprinkles that won’t bleed into the dough, keeping those cheerful bursts of color intact.
With these ingredients, you’re well on your way to baking deliciously vibrant funfetti cookies that can brighten any day!
Why You’ll Love This Funfetti Cookie Recipe
A delightful funfetti cookie recipe transforms ordinary baking into a joyous celebration with every bite. Picture this: the laughter of friends mingling in the kitchen while colorful sprinkles dance through a rich, buttery dough, turning a simple treat into a festive delight. These cookies are reminiscent of childhood celebrations, not just for their vibrant look but for their deliciously soft and chewy texture.
The Secret of Multicolored Joy
-
Vibrant Sprinkles: The standout feature of this recipe is, of course, the sprinkles. They don’t just add color; they infuse every cookie with an element of surprise and whimsy.
-
Soft and Chewy Texture: Achieving cookies that are both soft and chewy is an art. Follow our recipe’s precise measurements for flour and butter, and you’ll be rewarded with a delightful texture that melts in your mouth.
-
Versatile for Any Occasion: Whether it’s a birthday, holiday, or just a Tuesday, these cookies are perfect for any occasion. Their colorful appeal lifts spirits and invites smiles, making them a favorite for gatherings.
-
Easy to Make: With minimal steps and common ingredients, whipping these up is hassle-free, even for novice bakers. Who doesn’t love a quick and satisfying baking session?
Incorporating a sense of fun into your baking has never been easier than with this funfetti cookie recipe. Indulge in the joy of creating these scrumptious treats and spread some cheer in your life!
Variations on Funfetti Cookies
Exploring variations on the classic funfetti cookie recipe can really elevate your baking game. These delightful cookies are a canvas for creativity, allowing you to customize their flair and flavor based on your personal preferences or dietary needs.
Different Types of Sprinkles to Use
Sprinkles are the iconic star of funfetti cookies! While classic rainbow sprinkles are a favorite, why not switch things up? Here are a few options that can add a colorful twist:
- Confetti Sprinkles: With their vibrant colors, they add an extra pop to your cookies.
- Chocolate Sprinkles: Perfect for those who can’t resist the combination of chocolate and vanilla.
- Nonpareils: These tiny beads add a sophisticated touch and a bit of crunch.
- Seasonal Sprinkles: Use themed shapes for birthdays, holidays, or special occasions!
Flavor Variations
Enhancing your funfetti cookie recipe with additional flavors can make these cookies even more irresistible:
- Chocolate Chips: Mix in semi-sweet, milk, or even white chocolate chips for a chocolatey delight.
- Nuts: Chopped pecans or walnuts complement the sweet dough beautifully, adding texture and flavor.
- Oreo Crumbles: For an extra twist, fold in crushed Oreo cookies for a cookies-and-cream version.
Gluten-Free and Vegan Options
Baking should be accessible for all! If you or your guests have dietary restrictions, these adaptations will keep everyone smiling:
- Gluten-Free: Substitute regular flour with a 1:1 gluten-free flour blend. This ensures the cookies maintain their delightful texture.
- Vegan: Swap traditional butter with coconut oil or a vegan butter alternative, and use flax eggs instead of chicken eggs (one tablespoon of ground flaxseed mixed with three tablespoons of water equals one egg).
These easy variations on the classic funfetti cookie recipe allow you to enjoy this treat in countless delicious ways, making every batch a new experience. Happy baking!
Cooking Tips and Notes for Funfetti Cookies
Creating the perfect batch of funfetti cookies is more than just following a recipe; it’s all about the little details that make a big difference. Let’s dive into some essential tips to elevate your baking game.
Importance of Chilling the Dough
Chilling the dough is a crucial step that shouldn’t be overlooked in your funfetti cookie recipe. While it may seem like extra time, refrigerating the dough for at least 30 minutes allows the flavors to meld and firms up the butter. This results in thicker cookies that spread less during baking, giving you that perfect chewy center with crispy edges.
Why Measuring Ingredients Accurately Matters
Accurate measurements ensure consistency in your funfetti cookie recipe. Baking is a science, and even a slight variations can affect texture and flavor. Invest in a good kitchen scale for precise measuring or use the spoon-and-level method for dry ingredients. This ensures you’re not packing flour too tightly or adding too much sugar, resulting in the perfect cookie each time.
Tips for Perfect Baking Results
- Oven Temperature: Preheat your oven fully to ensure even baking. An oven thermometer can help confirm that it’s at the right temperature.
- Baking Sheet Prep: Line your baking sheet with parchment paper for easy removal and to prevent sticking.
- Baking Time: Keep an eye on your cookies; they should look slightly underbaked when you take them out. They will continue to cook on the baking sheet as they cool.
Pair your baking with a cup of coffee or tea, and enjoy the delightful experience of whipping up these funfetti cookies!
Serving Suggestions for Funfetti Cookies
Crafting the funfetti cookie recipe is an exhilarating culinary adventure, bursting with colors and flavors that evoke the joy of cake. But the fun doesn’t stop in the kitchen; how you choose to serve these delightful cookies can elevate the experience even further! Here are some vibrant suggestions.
Perfect Pairings for Comfort
- Milk: The classic go-to for cookies, a chilled glass of milk complements the sweetness and enhances the funfetti flavor.
- Ice Cream: Sandwich your cookies around a scoop of your favorite ice cream for an indulgent treat that will impress guests. Vanilla bean is a classic pairing!
- Coffee or Tea: For a more adult twist, consider pairing with a robust coffee or a fragrant herbal tea that balances the sweetness.
Festive Presentation for Gatherings
- Cookie Platter: Arrange the cookies on a colorful platter, mixing in other fun treats, like chocolate-dipped strawberries or rainbow fruit skewers.
- Themed Decor: Utilize festive decorations, like colorful plates or napkins, to match the cookie’s vibrant sprinkles. This sets a whimsical tone for any gathering.
- Cookie Bar: Create a DIY cookie bar with toppings like whipped cream, chocolate syrup, and fresh fruit, allowing guests to customize their experience.
Thoughtful Gift Ideas
- Clear Bags with Ribbon: Pack individual cookies in clear bags tied with colorful ribbons for a charming, homemade gift.
- Decorative Boxes: Assemble cookies in decorative boxes or tins, ideal for birthdays or as holiday gifts.
- Personalized Labels: Add a personal touch with handwritten labels or tags that include the recipe name and a sweet note.
With these serving suggestions, your funfetti cookie recipe will shine at any occasion, becoming not just a treat, but a celebration!
Time Breakdown for Funfetti Cookies
When I first baked these delightful funfetti cookies, I discovered how each step adds to the charm that’s captured in every colorful bite. Understanding the time breakdown makes it easier to plan your baking session for maximum enjoyment!
Preparation time
Getting everything ready takes about 15 minutes. Gather your ingredients, measure them out, and mix up the batter.
Chilling time
To enhance the flavors and texture, let the dough chill for 30 minutes. This step is crucial for that perfect cookie consistency!
Baking time
You’ll want to spend about 10-12 minutes baking your cookies until they’re golden and slightly soft in the center.
Total time
From start to finish, you’ll need around 55-57 minutes for this fun and festive funfetti cookie recipe. Just think of it as a small adventure in the kitchen, with a sweet reward at the end!
Nutritional Facts for Funfetti Cookies
Understanding the funfetti cookie recipe doesn’t just stop at baking; it’s also essential to consider what’s going into those delightful treats.
Calories per cookie
Each scrumptious funfetti cookie typically contains about 120 calories. This makes them a fun option for dessert, but it’s good to enjoy them in moderation!
Sugar and fat content
These cookies have around 8 grams of sugar and 5 grams of fat. The combination of sugar and butter creates that deliciously rich flavor that pairs perfectly with festive sprinkles.
Dietary considerations
If you’re navigating specific dietary needs, it’s worth noting that this funfetti cookie recipe contains gluten and dairy. However, by substituting with gluten-free flour and a vegan butter alternative, you can still indulge without missing out on the fun!
FAQs about Funfetti Cookies
Delving into the delightful world of Funfetti cookies is always a joyous experience. These colorful treats tend to evoke fond memories of birthdays and celebrations. You might have some pressing questions about how to make the most of your baking adventure, so let’s dive into the common FAQs surrounding this joyous recipe.
Can I freeze Funfetti cookie dough?
Absolutely! Freezing Funfetti cookie dough is a fantastic way to keep some dough on hand for future cravings. Just scoop the dough into balls and arrange them on a baking sheet. Freeze until solid, then transfer the cookie dough balls into an airtight container or freezer bag. They can last up to three months in the freezer. When you’re ready to bake, there’s no need to thaw; just add a couple of extra minutes to the baking time.
What’s the best way to store leftover cookies?
To keep your Funfetti cookies soft and delicious, store them in an airtight container at room temperature. If you prefer them a bit firmer, you can leave the container slightly open for a few hours to allow some moisture to escape before sealing. For longer storage, consider placing a slice of bread in the container to help maintain moisture, or pop them into the freezer for fresh cookies any time!
How do I ensure my cookies remain chewy?
Achieving that perfect chewy texture in your Funfetti cookies starts with using the right ingredient ratios. Make sure not to overbake them; pull them out just when the edges are slightly golden and the centers look a bit undercooked. Additionally, using brown sugar instead of all granulated sugar adds moisture, contributing to a chewy bite. Finally, allow them to cool on the baking sheet for a few minutes before transferring them to a wire rack for the best texture.
Conclusion on Funfetti Cookies
Creating the perfect funfetti cookie recipe is a delightful journey that combines the joy of baking with the indulgence of colorful sprinkles. These cookies aren’t just treats; they’re mini celebrations, ideal for any occasion. Whether you’re baking for a party or just to brighten a regular day, you’ll find that each bite of these soft, chewy cookies evokes a sense of nostalgia and happiness.
To truly make them shine, don’t shy away from adding your favorite mix-ins or trying different sprinkles. The beauty of this funfetti cookie recipe lies in its versatility. So gather your ingredients and let the sweet aroma transform your kitchen into a cozy haven — you won’t regret it! Happy baking!
Print
Sprinkle Cookies
- Total Time: 100 minutes
- Yield: 20 cookies 1x
- Diet: Vegetarian
Description
Delicious and chewy sprinkle cookies made with butter, sugars, and jimmies.
Ingredients
Scale
- 8 tablespoons unsalted butter
- 1/3 cup light brown sugar (firmly packed)
- 1/3 cup granulated sugar
- 1 large egg
- 1/2 teaspoon vanilla extract
- 1 tablespoon honey
- 3/4 teaspoon salt
- 1/2 teaspoon baking soda
- 1/2 teaspoon baking powder
- 1–3/4 cups all-purpose flour
- 1/3 cup jimmies sprinkles
Instructions
- Melt the butter in a very large, microwave-safe bowl. Once melted, set aside for 5–10 minutes to cool to room temperature. Hot butter will melt the sugar and make the cookies greasy.
- Once butter is cooled to room temperature, stir in the light brown sugar and granulated sugar. Whisk until smooth, about 1–2 minutes (the butter and sugars should fully incorporate). Take your time; it may seem like they won’t come together, but keep mixing until completely integrated. Stir in the egg, vanilla extract, and honey. Mix until smooth.
- Add the salt, baking soda, and baking powder. Stir to integrate. Add the correctly measured flour and mix until just combined (don’t overmix). Gently stir in the sprinkles. Cover the bowl tightly and chill for 90 minutes.
- Preheat oven to 350°F. Line a sheet pan with parchment paper or use a nonstick liner. Roll dough balls (1 tablespoon (30g) in size) into tall, cylindrical balls. Place 6 cookie balls on the pan to give the cookies plenty of room to spread. Place the pan with the cookie balls in the freezer for 10 minutes (dough gets warm from being handled). Repeat with the rest of the cookie dough—you should get around 20–21 cookies from this dough.
- After 10 minutes in the freezer, bake for 8–12 minutes, erring on the side of underbaking to keep them soft and chewy. The cookies will bake a little more out of the oven, so take them out as soon as the edges start to lightly brown. Remove from oven and immediately press any edges that have strayed out a bit inward with the back of a metal spatula. Let cool on the pan for 5 minutes before transferring to a cooling rack. Repeat with the remaining dough until all the cookies are baked—or freeze some of the dough if you prefer.
Notes
- Note 1: Adjust flour measurement as necessary for desired dough consistency.
- Note 2: The type of sprinkles can affect the final look of cookies.
- Prep Time: 90 minutes
- Cook Time: 10 minutes
- Category: Desserts
- Method: Bake
- Cuisine: American
Nutrition
- Serving Size: 1 cookie
- Calories: 150
- Sugar: 12g
- Sodium: 100mg
- Fat: 7g
- Saturated Fat: 4g
- Unsaturated Fat: 2g
- Trans Fat: 0g
- Carbohydrates: 20g
- Fiber: 0g
- Protein: 1g
- Cholesterol: 20mg